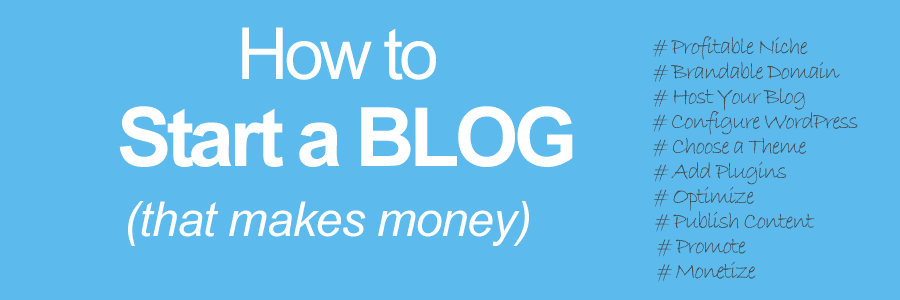
Don’t have a blog yet? Here’s the definitive guide on How to Start a Blog that Makes Money in 2024.
It’s an easy, step-by-step guide for beginners.
If you are new to blogging and looking for help on how to create a blog, you are in the right place.
In this guide I’ll walk you through every part of the process while helping you avoid the common mistakes new bloggers tend to do.
I hope, after applying the steps in this guide, you will be able to start a blog effortlessly (in less than 30 minutes, even if you are a complete newbie!).
How to start a blog (from scratch) that makes money?
This guide will cover:
- What to blog about (niche selection)?
- What is the best blogging platform and why?
- How to register a perfect domain name (that too for free)?
- How to choose the best hosting plan for your blog?
- How to install and setup WordPress blog?
- How to choose the best WordPress theme, install it and customize your blog design?
- How to customize and install the best WordPress plugins and why?
- What are the necessary pages you should put on your blog?
- How to add a contact form?
- How to write your first blog post?
- How to optimize your blog for SEO?
- How to add Google Analytics tracking code to your blog?
- How to grow your blog?
- How to make money blogging?
- What are best blogging tools and resources you need?
- How to start a blog FAQ
Welcome to the incredible world of blogging.
So, without further delay, let’s start a blog now.
First thing first,
In terms of resources, you need only TWO things to create a blog:
1. A domain name idea (your blog’s online address. For example, the domain name of this blog is WebContentEdge.com). (You can change your domain name anytime you like – will talk about it some other day)
2. A web hosting account – a place where you store your website files and publish your site on the internet.
If you have a perfect domain name and it is hosted on the web, you are ready to begin the blogging journey.
How?
Below are all the steps to start a blog:
(Please Note: This guide is the concise form of all the steps you’ll want to take to start a blog. You can click on the links given at the bottom of each section to learn things in detail.)
Step #1: Select a Perfect Niche (Subject) for Your Blog

Before you start a blog, you need to select a subject/topic/niche for your blog.
A perfect niche is one that:
- Has low to moderate competition
- Has big audience base (potential traffic)
- Has a broad scope for content creation
- Is easy to monetize – has commercial viability
So, for your new blog, you want to choose a niche that is relatively less competitive, has good monthly search volume (number of people searching for that topic), and high buyer intent (high–intent search).
Your niche should be broad enough so that you can create as much content (series of articles) as you need/want, and expand your blog when you wish.
Need more details? Read my complete guide on: Smart Tips for Choosing a Profitable Niche for Your Blog
Step #2: Pick a Smart Name for Your Blog (Domain Name)

Get your blog an address.
As you might know, you will need a domain name to start a blog. So, get a perfect domain name for your blog.
A perfect domain name should be:
- Easy to remember – short and catchy
- Reflect your business and/or personality
- Brandable name
- Broad enough (Scope for growth)
- Avoid numbers and hyphens
- Preferably ‘.com’ extension
How much does a domain name really cost? It depends – ranging from as low as $10 to $15 to millions. For instance, Cars.com was valued at $872 million. That’s simply insane, right?
Well, you need not panic. You can be the proud owner of an amazing, brandable domain name for as low as $10.
Even better, you can get a FREE domain with your hosting account.
Still confused? Read in-depth guide: How to Choose a Winning Domain Name for Your Blog?
Step #3: Choose Right Blogging Platform
When it comes to choose a blogging platform, here are a few factors to consider:
- Control over customization
- Ease of use
- Features
- Security
- Search engine friendly
- Scalability and flexibility
- Cost
WordPress meets all these criteria.
So, the best blogging platform is undoubtedly WordPress. It’s the most used blogging CMS in the world.
It’s open-source software, which means no one-time or recurring costs are involved for CMS.
WordPress comes with a lot of features, has a low learning curve, is highly customizable, and is easy to set up and manage. WordPress is SEO-friendly as well.
So, don’t think too much about it. Start a blog with WordPress. Use WordPress without any fear or confusion.
Need more details on WordPress and other blogging platforms? Here’s the in-depth guide on: Expert Guide for Choosing the Best Blogging Platform
Step #4: Start a Blog: Get Your Blog Online

In order to start a blog, you need a web hosting account.
Don’t be get lured by so-called “free-blogging” platforms. Nothing is free here. It’s an illusion – a trick to trap you, and then push their ads/products on you. Which actually costs you more than a self-hosted plan.
With no quality features except a simple typing module, these platforms curb your creativity and hinder your blog growth.
Instead, start a blog on a self-hosting platform. If you are on a budget, buy a shared WordPress hosting plan from a reputable provider. If price isn’t an issue, you can always get an advanced plan like dedicated or VPS hosting.
Before you buy a hosting plan, don’t forget to consider these factors:
- Your hosting needs
- Speed and uptime
- Security & support
- Disk storage, ram, traffic limits
- Server location
- Reliability & reputation
- Cost
If you aren’t sure where to start, I’d recommend Bluehost shared hosting plans.
Primary for these reasons,
- Bluehost is officially recommended by WordPress
- Solid track record – Excellent performance and security
- Tried and tested – Trusted by millions of website owners
- Beginner friendly (they will install WordPress for you)
- WordPress-specific platform (for those using WordPress)
- Affordable (plus, offers a ‘free domain’ even with the cheapest hosting plan)
Please note: Whichever hosting company you choose, make sure you thoroughly check out their solid track record – performance, features, security, and support etc. If you are using WordPress, your host should offer WordPress-specific solutions as well.
This is important because switching your host down the line can be a big hassle, which you’ll want to avoid.
Still not convinced? Here’s our complete guide on How to Choose the Right Hosting Plan for Your Blog.
Step #5: Install WordPress and Configure Your Blog
Once you get a hosting account, it’s time to install and set up WordPress.
In order to start a blog, you need a blogging platform that you have already picked. I assume your choice of platform is WordPress.
Installing WordPress shouldn’t be a problem as most of the big hosting providers offer one-click installer. Just a click and you are done.
Bluehost goes even further. If you a purchase hosting plan from them, they will install WordPress automatically on your site. You don’t need to do anything.
How easy, isn’t it?
Prefer to learn things from the ground up? Read our guide on How to Install WordPress the Right Way?
Step #6: Select a WordPress Theme and Customize Your Blog Design
Well, your site is up. WordPress is configured. Now it’s time to give your blog a professional look. It includes installing a theme and making necessary changes.
There are tons of WordPress themes available – both, free and premium.
If you don’t want to spend on a theme, pick a free theme from the WordPress directory.
For more advanced features, go for a premium theme such as ElegantThemes Divi theme or another similar theme.
The advantages of a premium WordPress theme are flexibility & control, enhanced security, support, better visual appeal, better features, and more customization options. But it will cost you money.
It’s totally up to you.
Once the theme is installed, you will need to add a unique logo. You can also customize the color and structure of the theme.
Next, create menus – both, top menu and bottom menu.
The top menu should include important links such as home, blog, services, contact (if you are selling something), etc.
The bottom menu should include basic pages such as privacy policy, terms page, disclaimer page, about page, etc.
You’ll want to remove unnecessary widgets from sidebars and bottom areas such as the “recent comments” widget, “log in” widget, etc.
For more details, see our comprehensive guide Selecting the Perfect WordPress Theme (and Things to Consider)
Step #7: Install WordPress Plugins
Next comes the installation of necessary plugins. There are some very useful plugins that you’ll want to add to your blog.
Installing WordPress plugins is an easy affair. Just visit WordPress dashboard and head over to Plugins >> Add New menu on the left.
On the plugin page, type in the plugin name or a related keyword in the search box there. It’ll show all the plugins available for that term. Click on the install button. After installation, don’t forget to activate it.
What WordPress plugins will you need (in the beginning)?
In the beginning, I would recommend you install the necessary plugins only. Don’t go overboard by installing every plugin out there.
You don’t need them all right now. Moreover, unnecessary plugins will slow your blog down. You can add other plugins as and when you need them.
Below are the most important WordPress plugins for beginners:
1. SEO Plugin: SEO Yoast, Rank Math, All-In-One SEO (pick any one) – SEO plugins help you optimize your blog for SEO.
2. Contact Form Plugin: WPForms, Contact Form 7 (pick any one) – Add a contact form plugin if your WordPress theme doesn’t already have one. Otherwise, you don’t need them.
3. Table of Contents Plugin: Easy Table of Contents, Table of Contents Plus (you only need one)
4. Customization/Page Builder Plugin: Divi, Elementor (pick any one) – Page Builders allow you to easily build intuitive pages by simply using “drag and drop” content elements such as blocks, modules, or widgets – without writing any code.
5. Performance/Speed Plugin: WP Rocket, WP Super Cache, W3 Total Cache (you only need one) – The caching plugins help you optimize your WordPress blog for speed and performance – they reduce load times and speed up your site, thereby improves the SEO and user experience.
Here’s the complete list of WordPress Plugins for Blogs, plus How to Guide
Step #8: Optimize Your Blog for SEO
So, your WordPress blog is up and running. What next?
The primary purpose to start a blog is to attract a target audience to your blog.
For that, the very first thing you want to do is to optimize your blog for SEO.
Below are a few steps you can take to make your blog SEO-friendly:
1. Create a custom URL structure: Visit your WordPress dashboard. On the left, hover over ‘Settings’, then click the ‘Permalinks’ option (Settings >> Permalinks). Under ‘Common Settings’ tick the ‘Post Name’ button. Don’t forget to click on the “Save Changes” button at the bottom.
2. If you have not installed an SEO plugin such as Yoast SEO or Rank Math, please install and activate any one of these.
3. Integrate Google Analytics to your blog. Visit Google Analytics page located here and follow the steps.
4. Finally, you’ll want to add your site to Google Search Console. Visit Google Search Console page here and follow the steps.
5. Create and submit an XML sitemap to Google Search Console.
6. Make sure your blog theme is responsive.
7. Content optimization:
- Optimize your pages and posts around target keywords – pick a Main Keyword for each article.
- Put your primary keyword in the beginning of the blog post or page.
- You also want to put your main keyword in tittle tag and Meta description.
- Likewise, you want to optimize your header tags, image names and alt tags.
- Internal linking: Use internal links strategically. Link your pages when relevant.
Learn more about How to Optimize Your Blog for SEO: Site Architecture, Content, HTML and more.
Step #9: Add Necessary Pages to Your Blog
Before you start publishing content on your topic, it’s important to add some basic yet necessary pages.
Visit your WordPress dashboard and click on the Pages >> Add New (available on the left).
Consider adding following pages to your new blog:
- About page
- Services/products pages
- Contact page
- Privacy policy page
- Terms of use page
- Disclaimer page
What other pages do you need to have (when you start a blog)? Why do you need them? In this guide we’ve tried to answer all such queries: Essential Pages Every Blog Should Have and Why?
Step #10: Publish Your First Article (Blog Post)
Well, you have reached this stage, which means you have completed all the basic settings and customizations required to start a blog. Great!
Now is the time to write a compelling story that your readers (as well as Google) love.
Here are the steps to start blog content writing:
1. Plan your content first
2. Perform keyword research (you can use any of the keyword search tools such as Google Keyword Tool, SEMrush, Ahrefs, UberSuggest etc.)
3. Create great content around selected keywords (one major keyword per post)
4. Make it engaging that your readers love
5. Publish it
6. Share your thoughts with the world (on social media, industry forums, and other niche blogs, etc.)
Need help writing engaging content? Our SEO copywriting guide will help you Write High-Value Blog Posts that Your Readers (and Google) Prefer.
Summary: Steps to Start A Blog
Quick Summary of How to Start a Blog in 10 Easy Steps:
1: Select a niche to blog about
2: Get a brand-able domain name
3: Select a right platform to blog
4: Buy a hosting for your blog
5: Install and configure WordPress quickly
6: Customize your blog design with a perfect WordPress Theme
7: Install necessary WordPress plugins
8: Optimize your blog for search engines
9: Add must-have blog pages
10: Start blogging – publish your first ever blog post
I hope, after applying the steps in this guide, you will be able to start a blog effortlessly.
To your blogging success,
